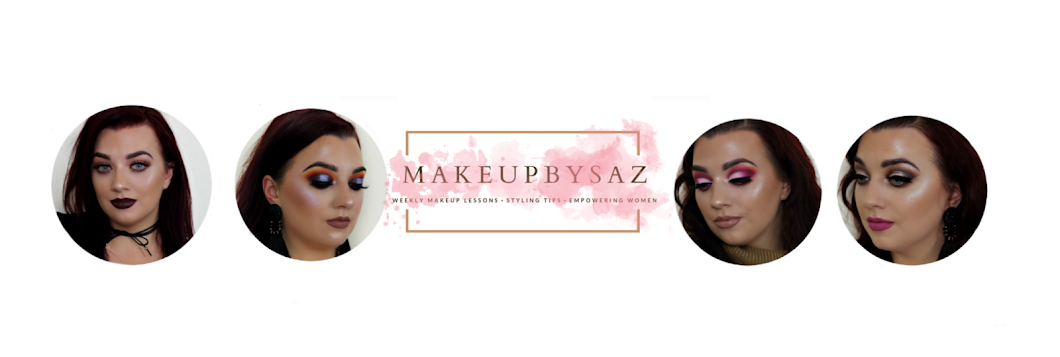
Friday, February 25, 2011

Mermaid Inspired Makeup!


Hey girls,

Sorry i havent done any tutorials in a while I have a natural everyday look coming up for you which I will put up in a few days but today im going to do a mermaid inspired look for you guys!
Ive always loved anything to do with mermaids so I put a few ideas together for ye so let me know what you think and let me know if you would like to see more of these tutorials or more natural tutorials or if you have any requests comment below or send me a email :)
oh and if you would like to WIN a makeup goodie bag including a M.A.C eyeshadow or your choice enter my fun contest!!! the link wil be at the end of this post cant wait to see what you come up with!!!

ok so lets get started!!


WHAT I USED:
  • Coastal Scents 88 shimmer palette (used purple sliver and black)
  • Smashbox primer
  • Smashbox pore and line primer
  • L'oreal true match foundation in w3
  • Nyx eyeshadow base in white
  • Essence brow kit
  • Nyx wand concealer in light
  • Vaseline
  • Nyx trio in sweet lagoon/aqua/ocean
  • L'oreal liquid liner (black)
  • Urban Decay 24/7 liner in zero
  • Avon supershock mascara
  • Glitter silver liner (dunnes) 


  1. First of all prime your skin with a primer as they say its a crime not to prime :P this will help your makeup last all day and protect your skin.

  2. I also used smashbox pore and line primer this primer is great at covering any imperfections like expression lines and open pores and stopping your foundation from making these lines/pores more visable (this can also be used over foundation)

  3. Next prime your lid and using a white base apply all over lids up to your brow bone and blend in with your ring finger.if your dont have a white primer you could use a white pencil liner or a cream eyeshadow,the white will help brighten the colours.

  4. Then taking a mint colour or if your using the same nyx trio take the first colour and apply this to the inner corners of your lids and use it as a highlight on your brow bone using a shader brush or a sponge applicator

  5. Now flip your brush/applicator and taking the second colour or a mid blue colour apply this all over your lids dont pass your crease line

  6. Take a blending brush/fluffy brush and apply the third colour or a teal colour just above your crease sweep the colour back and forth blending the colour out

  7. Take a little bit of black with a sponge applicator and pat it into your outer v and blend it with the blending brush you used to blend the teal colour, this way you wont apply too much black

  8. Line your top lid with a liquid liner and your water line using a pencil liner

  9. apply a purple colour to your lower lashline

  10. Curl your lashes and add mascara

  11. Take a sliver liner and apply it over your liquid liner I got mine in a set of 3 in Dunnes for 2euro

  12. Apply vaseline to your lips and take a sliver eyeshadow and apply it to the centre of your top and bottom lips using your finger or a flat brush then take the teal colour and apply it to your cupids bow using a sponge applicator.

  13. Apply your foundation as normal and a small bit of blusher dont over do your foundation you want your skin to look natural like a mermaid :)


For a bit of sparkle i used some jewels on my cheekbone
I applied a bit of eyelash glue on the back of my hand
picked a jewel up using tweezers and dipped it into the glue carefully and applied it on my face
These are actually rhinestones for your nails and can be purchased at any salon supply store.


or if you want you can apply the teal colour to your cheekbones using a fluffy brush :) 


FOR YOUR HAIR:
You could wet your hair and plait it and leave it dry naturally
then remove the plaits and brush through your hair creating natural wavy locks
or

                        Take a brush and brush upwards as if you were back combing your hair


           It will give you that messy out of bed look apply hairspray if needed and your all done


HOPE YOU ENJOYED THIS LOOK AND DONT FORGET TO ENTER MY CONTEST IF YOU WANT TO WIN SOME M.A.C MAKEUP!!


love
saz xxx

Tuesday, February 22, 2011

contest time :)

hey peeps :)


So today I have a fun contest for you to celebrate my 190 followers :D
I was just going to do another giveaway but thought id make it a little more fun this time....


Heres what to do:


I want ye to come up with makeup look, hairstyle, outfit or drawing etc by using or being inspired by 1 of the four seasons
Spring, Summer, Autumn or Winter
You can do ANYTHING you want,
I want to see your talent! so be creative!!!!!!


HOW TO ENTER:


  • You must be a follower or a fan of my facebook group
  • Send me a email "sarahkent59@yahoo.ie and include a picture or a video link of what you came up with and tell me a bit about yourself
  • contest will close on the 30th of march
  • I will contact the winner via email and then post it on my blog along with all my favourite entries
  • If you enter with a youtube video make sure you email me the link
  • contest is open worldwide
  • contest is open to everyone you dont need a blog/youtube channel to enter
  • you can enter as many times as you like


  THE WINNER WILL RECIEVE A M.A.C EYESHADOW OF THEIR CHOICE AND A BAG OF GOODIES :) !!!!


Good luck!!!!
love
saz xx


Saturday, February 19, 2011

Exciting News for all my Irish viewers/followers!!!

Hey girls,
Do you love Urban Decay, Bobbi Brown,Smashbox and Lancome products but find they leave a huge hole in your pocket well lucky for your theres a solution...

The Makeup Stop in Galway, Ireland sells all these products and more at cheaper prices!!!
You will even find Stila products yes you heard right Stila. The Makeup Stop is the only shop in Ireland that currently sells stila products.
The Makeup Stop is located on shop street, Galway and makeovers are also available
If your in the Beauty Trade you will also receive 20% discount!!!
You wont find better prices anywhere else!!!
 In the coming weeks delivery to uk and ireland will also be available!!!


check out their facebook page:


hope this was helpful!
love
saz xx

P.S Dont forget to check out my exciting contest you could win a M.A.C eyeshadow and lots more !!! click here

Tuesday, February 15, 2011

contest time!!!

hey peeps :)

So today I have a fun contest for you to celebrate my 190 followers :D

I was just going to do another giveaway but thought id make it a little more fun this time....


Heres what to do:

I want ye to come up with makeup look, hairstyle, outfit or drawing etc by using or being inspired by 1 of the four seasons
      Spring, Summer, Autumn or Winter
You can do ANYTHING you want,
 I want to see your talent! so be creative!!!!!!


HOW TO ENTER:
  • You must be a follower or a fan of my facebook group
  • Send me a email "sarahkent59@yahoo.ie and include a picture or a video link of what you came up with and tell me a bit about yourself
  • contest will close on the 30th of march
  • I will contact the winner via email and then post it on my blog along with all my favourite entries
  • If you enter with a youtube video make sure you email me the link
  • contest is open worldwide
  • contest is open to everyone you dont need a blog/youtube channel to enter
  • you can enter as many times as you like


THE WINNER WILL RECIEVE A M.A.C EYESHADOW OF THEIR CHOICE AND A BAG OF  GOODIES :) !!!!


Good luck!!!!

love saz xxx

Sunday, February 13, 2011

How to clean false lashes

Hey girls,
I know how much us girls can spend on false lashes so today im going to show you how you can clean your lashes and get a few more wears out of your lashes saving you money :)


WHAT YOU WILL NEED:

  • Your dirty lashes
  • A bowl
  • eyelash curlers
  • Any eye makeup remover
  • Any foaming cleanser
  • eyebrow/eyelash comb


step 1. Take your lashes and gently pick any lumps of clue off them 
step 2. Pour some eye makeup remover into your bowl and pop in your lashes. you dont need much just enough to cover your lashes
step 3. Leave your lashes soak for 5 or 10 minutes

step 4. wet your hands and foam up some cleanser in your hands


step 5. place one of your lashes into to palm of your hand and place your other hand on top of the lashes and leave for about 30 seconds 
step 6. Now with your index and middle finger start rubbing your lashes gently you dont want to ruin the shape of your lashes

step 7. Using a eyebrow/eyelash comb,
comb your lashes
step 8. Place your lashes back into the bowl for a few minutes and repeat the same steps with your other lashes,
step 9. Remove your lashes from the bowl and allow to air dry for a few minutes, if needed rub a damp cotton pad over your lashes to remove any left over mascara


step 10. This is optional, take something round and wrap your lashes around it
step 11. Heat your eyelash curlers for a few seconds under a hair dryer and curl your lashes.


Now your lashes should be nearly as good as new :)
place your lashes back in their case to prevent them from getting damaged!
hope this was helpful
love
saz xx
ps thanks for following and leaving such lovely comments!!

Friday, February 11, 2011

How to tint and shape your eyebrows like a professional!

hey girls,
Being a beauty therapist I know how much girls can spend in a salon every month so today im going to show you how you can tint and shape your eyebrows youself at home without spending a penny :)

Warning:
When using tint for the first time its important to do a patch test 48 hours before. Apply the mixture behind your ear or inside your arm if any redness or swelling occurs this is a sign of a allergic reaction and do not use the tint also if you have any recent scar tissue,cuts,eye diseases or lumps around the eye area do not use the tint.

Heres what you need:
  • Vaseline (acts as a barrier)
  • Brush
  • Wood stick
  • Tweezers
  • Brown tint and peroxide (available at any salon supply store shouldnt cost much and lasts a very long time, black and blonde tints also available)
  • Disposable lip brush (available at debenhams or any salon supply store)
  • Glass jar (available at any salon supply store)
  • Sterex witch hazel (optional also available at any salon supply store)
How the tint works:
The tint is made of mineral water or vegetable oil and you only use 3% of peroxide
tinting works due to the dye penetrating the hair shaft. when dye molecules are applied they are small enough to penetrade the hair shaft but its oxidised by the peroxide and the molecules become larger this has the effect of locking in the dye and making it permanent,
tinting should last for about 6 weeks

ok so lets get started :)


  1. Cleanse your skin ( this is important when waxing or plucking your eyebrows as your pores are open and makeup and bacteria can cause infections or swelling)
  2. Dip your disposable brush into vaseline and apply it to the skin around your eyebrows to protect your skin from staining
  3. If vaseline gets into your eyebrow hair just wipe it away using a cotton pad DONT LEAVE IT as this will stop the tint from getting at those hairs
  4. get your glass jar and fill it with no more than 10 drops! close the bottle straight away if peroxide is oxidised it will not work again.

6. Next sqeeze a pea sized amount approx 2cm of tint into the jar and stir using your brush
7. Mixture should be like a cream and not runny if it is just add more tint


8. Apply the mixture to your eyebrows using your brush
9.  Starting from the end of your eyebrow and working inwards apply tint in the direction of hair growth

10. Leave for approx 5 minutes
11. Remove tint with a cotton pad against and then with your hair growth to make sure to get all of the tint.
12. If you do manage to stain your skin dont worry it will come off 
13. Now grab your wood stick or a pencil and place the it straight up on the side of your nose this is where your eyebrow should start so any hair in front of the stick needs to be removed
14.Now leaving the end of the stick at the side of your nose slant the wood stick to the outer corner of your eye this is where your eyebrow should end


15. Look straight ahead in front of a mirror and place the stick at the center of your eye this is where your arch should be.
16. Using your index and middle finger stretch your skin and tweeze in the direction of hair growth doing this will prevent pre mature aging and plucking will never hurt again :)
17. If you suffer from alot of redness or swelling after tweezing using a which hazel gel will cool and soothe your eyes and its a natural antiseptic.

ENJOY!
love saz xx

Wednesday, February 9, 2011

Serena Glam Slam by O.P.I Review and Demo

Hey girls,

So I was out shopping recently and came across the O.P.I  black shatter nail varnish that everyone is talking about but unfortunately it was sold out! :( but then I came across "Serena glam slam" which is a O.P.I set by Serena Williams which includes the Black Shatter nail polish and Simply Smashing (glittery gold colour)
If you live in Ireland you will know that O.P.I polishes arent cheap here retailing at 12 euro per bottle but this set retails at 18 euro so your basically getting 2 polishes for 9euro each which isnt bad and you get a nice discount if your in the Hair or Beauty trade :)

So far im loving this polish its such a great invention, its easy to do and you can use the black shatter with any colour but when used with the gold colour it gives a leopard print effect.

Barry M also sells this nail varnish and at a cheaper price :) : heres the link


HERES A QUICK DEMO:

Pick a colour that you like and paint your nails applying 2 coats and leave to dry!


when your polish is completely dry paint over the whole nail quicky, the black will dry pretty fast as it drys it will crack giving you the shattered effect.
 
Apply a top coat to protect the polish and give it a shine and your all done!


hope this helps if you have any questions just comment below :)
love saz xx

Sunday, February 6, 2011

cute look for valentines :)

Hey girls, 
Today i did a cute simple valentines look for you, I used mac eyeshadows but remember drugstore shadows will work just as well! hope you enjoy this look and dont forget to follow and join my group on facebook :) 
thanks again for all your lovely comments i really appreciate it! :)
 

 Heres what I used:


  •  Nyx green concealer
  • Smashbox face primer
  • Urban decay mineral foundation in supernova
  •  Rimmel lipstick in 009 blush pink
  • Rimmel bronzer in medium matte
  • Smashbox mascara
  • Urban decay 24/7 liner in zero
  • Macs vanilla eyeshadow (highlight)
  • Macs retro speck (white shimmer with gold specks)
  • Macs swish(shimmery bright pink)
  • Macs hepcat (pinky plum)
  • Macs mystery (dark brown)
  • Mac blush in desert rose
  • Mac cream highlighter in pearl


So lets get started :)

  1. Ok first of all start by priming your face and eyelids. A primer will prevent your shadows  from creasing and will help your foundation last longer and it will also act as a barrier, protecting your skin from your foundation which can sometimes block your pores causing breakouts and blackheads!!
  2. Take a pink shadow and apply it all over your lid using a flat shader brush
  3. Flip your brush and using a plum colour apply this to your crease
  4. Now taking a fluffy or blending brush apply a small amount of a dark brown colour to the outer v and your lower lash line, dont forget to blend you shadows!
  5. Take a shimmery white or gold colour and apply this to the inner corners of your lids and lower lash line using a sponge applicator or a flat shader brush.
  6. Line your lids and water line and add mascara.
  7. For a more dramatic look you can use a liquid liner and apply some false lashes :)
  8. Apply your foundation (for foundation tips/tricks and reviews check out: http://makeupbysaz.blogspot.com/2010/08/my-top-5-foundations-plus-foundation.html )
  9. Suck in your cheeks making a fish face and apply bronzer to the hollows of your cheeks.
  10. Apply some blusher and for that extra glow use a cream highlighter on your cheek bones if you dont have a highlighter use a white shimmery eyeshadow this has the same effect!
  11. Apply a pale pink lipstick and your all done :D


Hope this was helpful!
love saz xxx